So you have removed the side panels, installed insulation, and ran your electrical lines. Now your next step is to frame your skoolie side walls and finish them with plywood.
Here’s how we built a frame and installed plywood to the side walls of our skoolie.
This video goes hand-in-hand with the step-by-step guide below (minutes 7:00-8:00). As always, get in touch if you have any questions!
Let’s dive in!
Previous Steps
At this stage, it’s expected that you have already:
- Removed the original metal side panels
- Insulated the side walls
- Had an electrician install your electrical wiring and outlet/light switch boxes
Tools & Materials You’ll Need
- 3/8 inch-thick plywood (we used untreated plywood)
- 1.5 inch wood furring strips (we used scraps left over from other parts of the conversion). The quantity and length of furring strips you need will depend on how much wall space you’ve built into your design. This will all make sense in Step 1 below.
- Sheet metal screws
- Wood screws
- Impact Driver + Drill Combo Kit
- A jigsaw
- A tablesaw
- Drill bits matching the size of your sheet metal screws (buy 3 because chances are you’ll have a few break)
Full disclosure guys, some of these are affiliate links, so we get a commission if you buy something from the list. As an Amazon Associate we earn from qualifying purchases. Not much, but something. This is really important: we only link to tools and materials we actually used and highly recommend. We do these guides completely for free, so these links are the only way we get a little something back (except for the satisfaction of knowing we helped you build your dream skoolie, of course!)
Don’t have Amazon Prime yet? Here’s a link for 30 days free.
Step 1: Install wooden furring strips to create a side wall frame
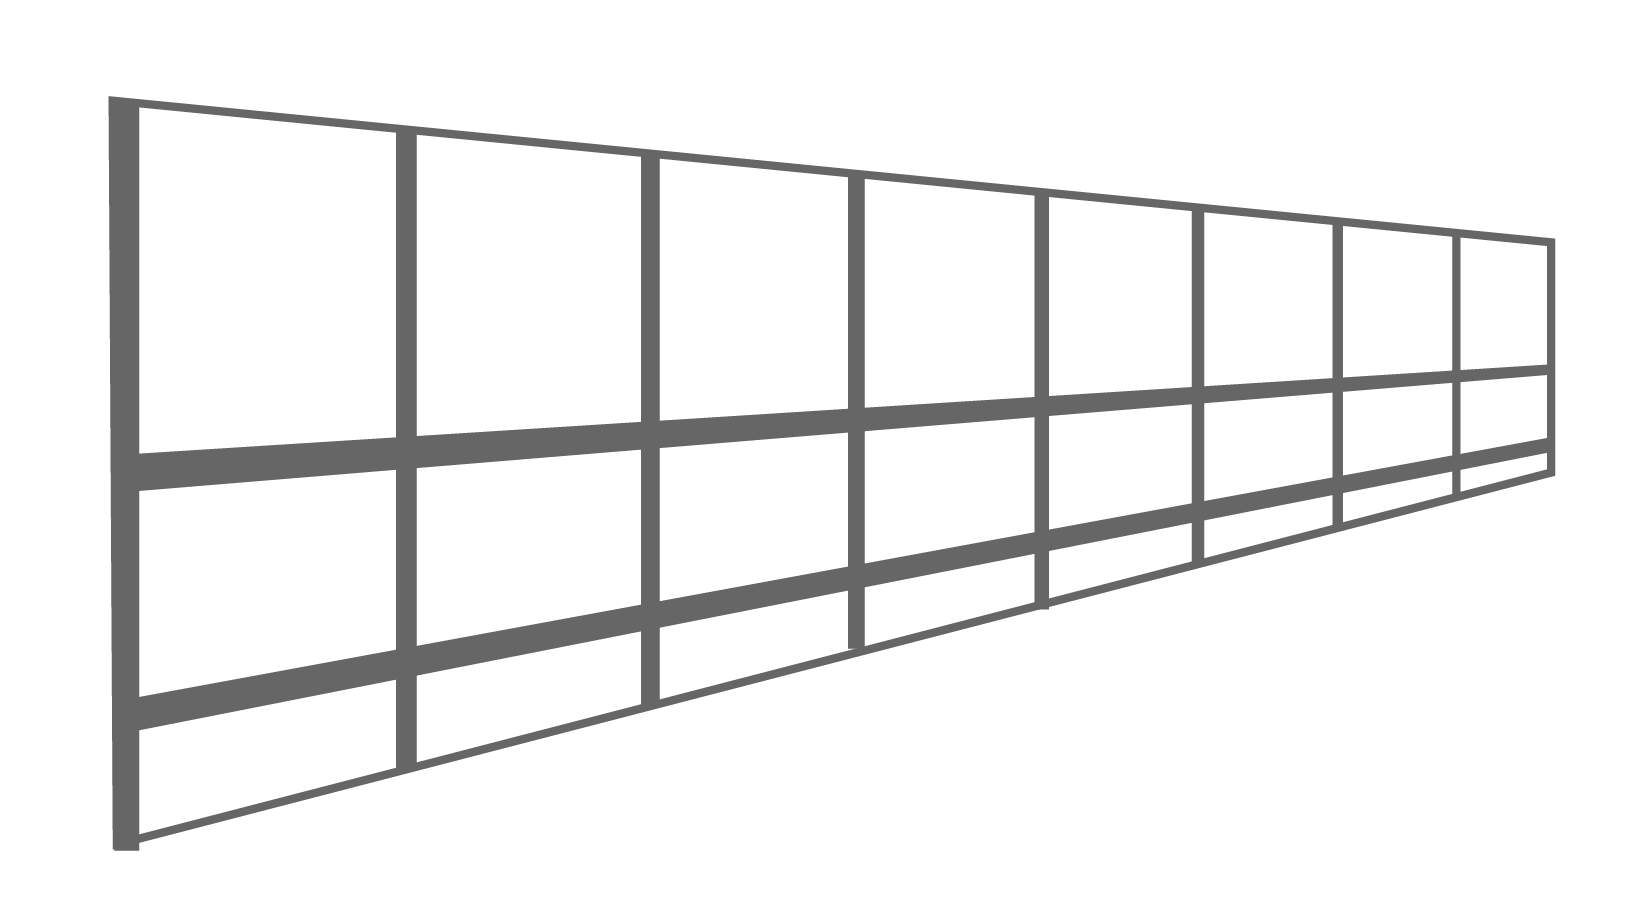
- Here is the metal frame of your bus. The upper squares are where your windows sit. The lower rectangles are where your side walls will be.
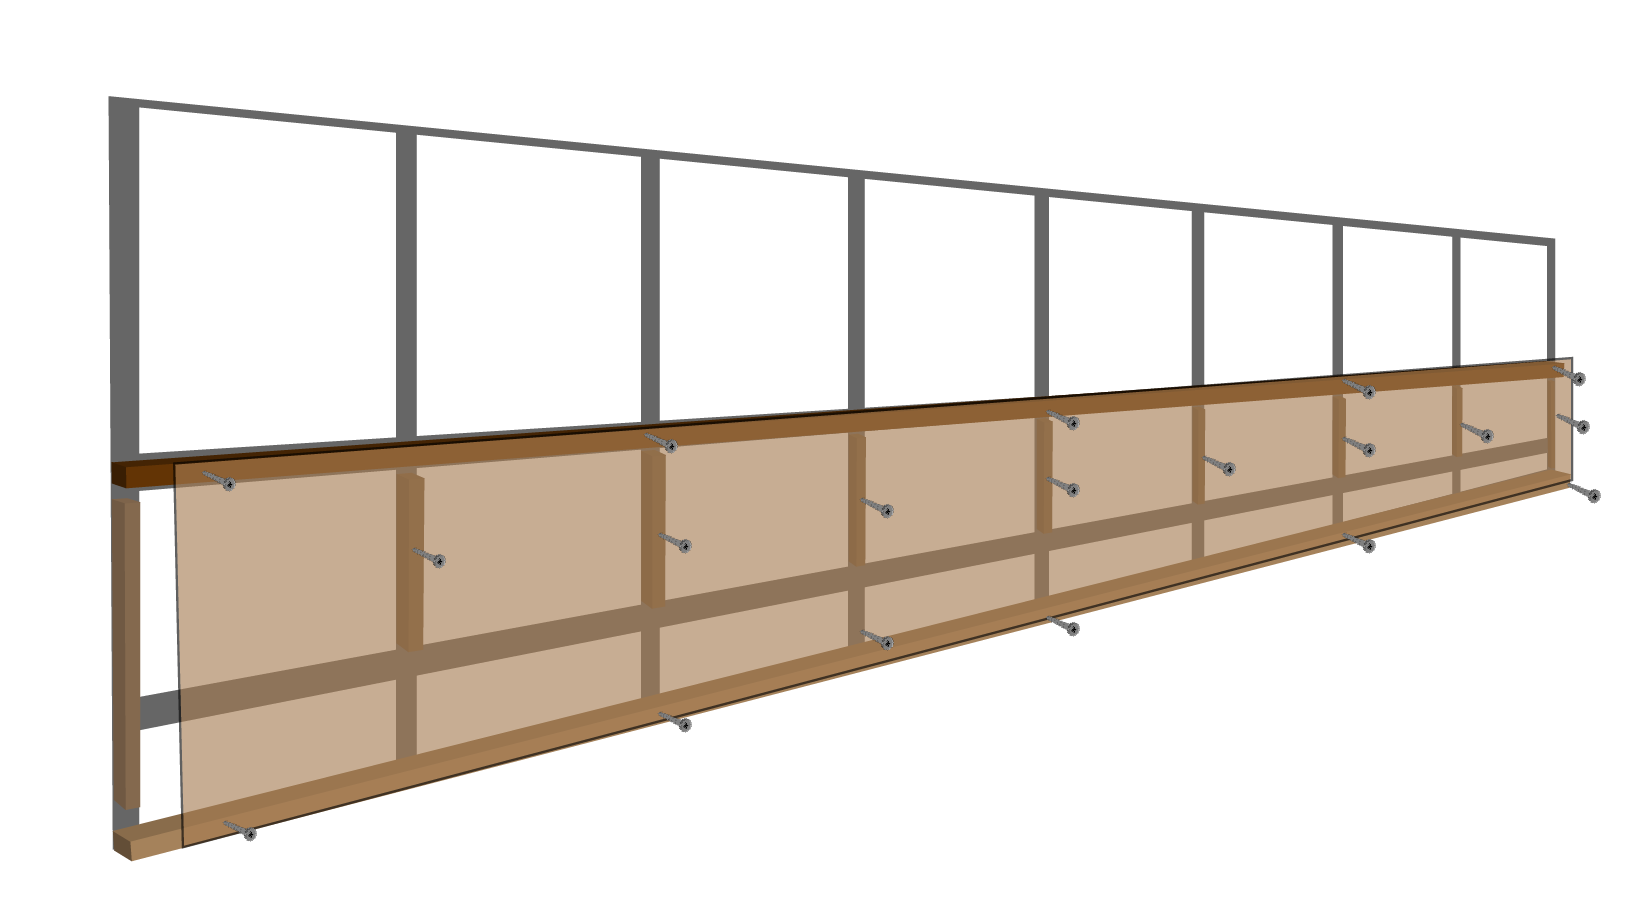
- Cut 1.5 inch thick furring strips to run along the top of the side wall, the bottom of the side wall, and the ribs that run perpendicular to each. Like this:

- Secure the furring strips to the metal frame with sheet metal screws. Pre-drill those holes, even if you’re using self-tapping screws. Even with self tappers, the heavy duty frame of the bus is strong enough to result in broken screw heads. Once you have a broken screw head, you have quite a job of getting that busted screw out. Avoid that whole fiasco by pre-drilling the holes.
Step 2: Cut plywood to size & secure to frame
- Cut the plywood into panels using a tablesaw. Use a jig saw for custom adjustments like holes for outlets. The size and shape of your plywood panels will depend completely on your bus design. You can see in our video (minute 7:40) that ours fit right beneath the windows, flush with the top and bottom furring strips.

- Secure the plywood to the frame using wood screws.
- And that’s that! Your side walls are now ready for whatever finishing paint you are going to cover them with! We used this stuff in some parts of the bus. In others, we used scraps of 1/4 inch plywood, painting with leftover paint from the exterior, and secured to the underlying plywood with invisible nails. But we’re getting ahead of ourselves! That’s part of another guide coming up!
Tip: You shouldn’t start framing out your walls until your subfloor is in place. Here’s why. If your bus is like ours, there is a slight lip at the bottom of the lower wall panel. When you install your floor insulation and plywood subfloor, you elimate this inconvenient lip by cutting a groove into the overlying plywood. Like this:
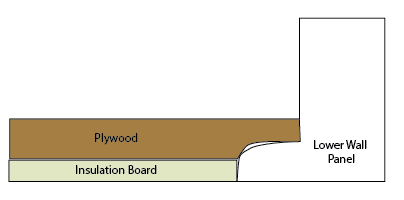
Eliminating the lip makes it easy to install the lower furring strip, because then the furring strip has a nice clean corner to fit into.
<< Back to the Skoolie Conversion Ultimate Guide Homepage

So you’re building a skoolie, huh?
We feel your pain, my friend! We also know how good it feels to finally make a dream reality.
Our skoolie took 9 months and $28,000 to complete. We documented the entire build and are slowly building a series of guides on every step of the bus conversion process.
We spent a crap ton of time figuring out how to do this and that. We also could have saved a few bucks along the way. We hope our tutorials help save you some time and money!
Our TOP 5 Bus Conversion Tools & Materials:
- 5-in-1 Painters Tool (you will use this a MILLION times)
- Impact Driver & Drill Combo Kit (there won’t be a day you won’t use this)
- 100% Silicone (buy in bulk to save a LOT of money!)
- Angle Grinder (get used to using this ALL the time!)
- Table Saw (it will be nearly impossible to complete your conversion without this. It’s WORTH the investment!)
This page contains product affiliate links. We may receive a commission if you make a purchase after clicking on one of these links.