Installing a skoolie door lock is one of the first things you should do after starting your conversion. This lock system works either as a long-term solution, or in the short term if you plan on later installing a house door.
In this step-by-step guide, we show you how we installed a round van lock the front door of our skoolie. We also show you how we secured our side lift door (only applicable to buses that had a wheelchair lift).
Let’s dive in!
Tools & Materials You’ll Need to Install a Skoolie Door Lock
- Van lock (comes with nuts & bolts)
- Impact driver + drill kit
- 5/16 drill bit
- Even better, save some money in the long run and get this drill bit set
- Black gate pull
- 6″ swivel hasp lock
- A clamp (buy a set, eventually you’ll need two or more at one time)
- 2 pieces of wood (one piece 12″ x 5″ x 1″) (one piece 5″ x 5″ x 1″)
Full disclosure guys, some of these are affiliate links, so we get a commission if you buy something from the list. As an Amazon Associate we earn from qualifying purchases. Not much, but something. This is really important: we only link to tools and materials we actually used and highly recommend. We do these guides completely for free, so these links are the only way we get a little something back (except for the satisfaction of knowing we helped you build your dream skoolie, of course!)
Don’t have Amazon Prime yet? Here’s a link for 30 days free.
Installing a Lock on the Front Door
Step 1: Mark location for holes on door
Place the lock against your door, holding it in exactly the place you will want it installed. While holding it in place, mark where the holes need to be drilled.

Step 2: Drill holes in the door
The lock we recommend comes with a full set of 5/16 nuts and bolts. You will need a 5/16 drill bit to drill through the door. Drill six holes where you made the marks in Step 1.
Step 3: Loosely secure the hasp to the door
The hasp is the “frame” that the round lock secures to. Bolt the hasp to the door, but don’t tighten the bolts all the way (in a bit you will undo them).
Step 4: Test that the lock secures properly
Do a test run and make sure the round lock secures in place and locks within the hasp. This is where we ran into a snag. The rubber lining of one of the bus doors prevented the two hasp sides from being flush with one another. So we cut away the portion of rubber standing in the way. After doing so, the two hasp sides met and the round padlock could lock correctly.
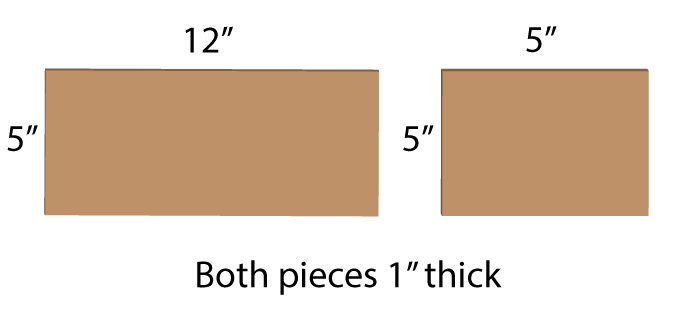
Step 5: Cut two pieces of wood for the inside of the door
Cut two pieces of 1″ thick wood. One piece should be 12″ x 5″ x 1″. The other piece should be 5″ x 5″ x 1″.
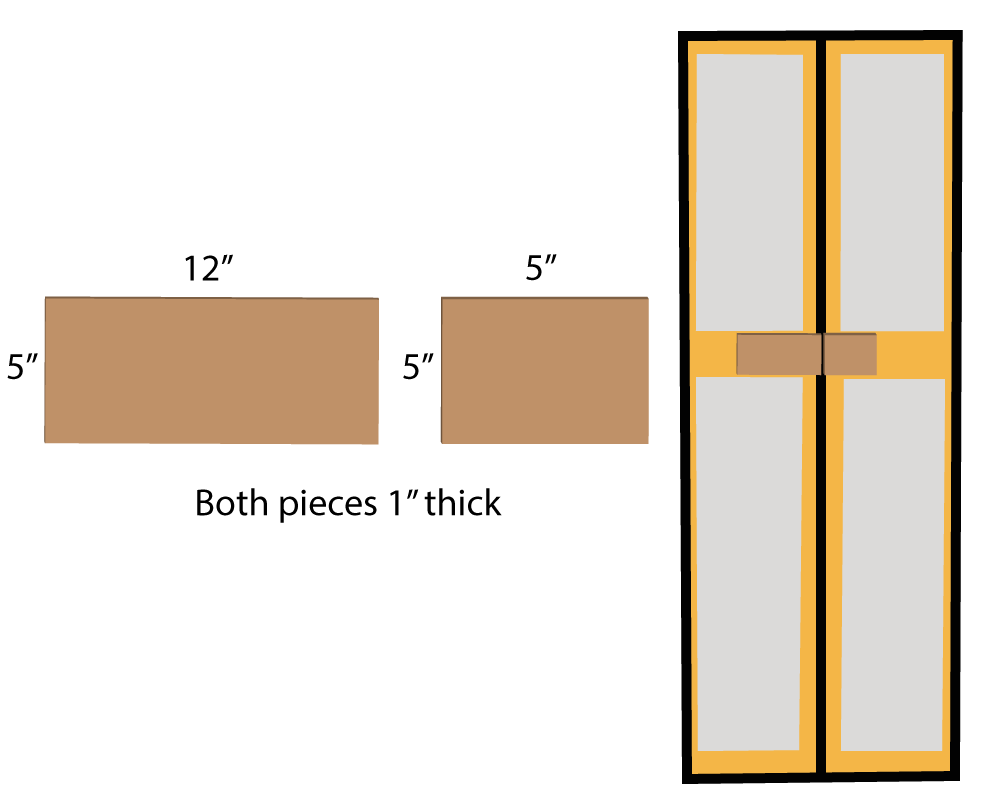
Step 6: Clamp the pieces of wood to the door
Remove the hasp completely from the door. Use clamps to secure each piece of wood to the inside of the door, positioned exactly where you want them to be.
Step 7: Drill through the door and through the wood
From the outside of the bus, drill through the door and into the clamped pieces of wood. This ensures that the outside holes will match perfectly with the holes in the wood.

Step 8: Without unclamping the wood, resecure the hasp
Resecure the hasp to the door, sending the bolts through the hasp, through the door, and through the two pieces of wood. This time, tighten the bolts for good.
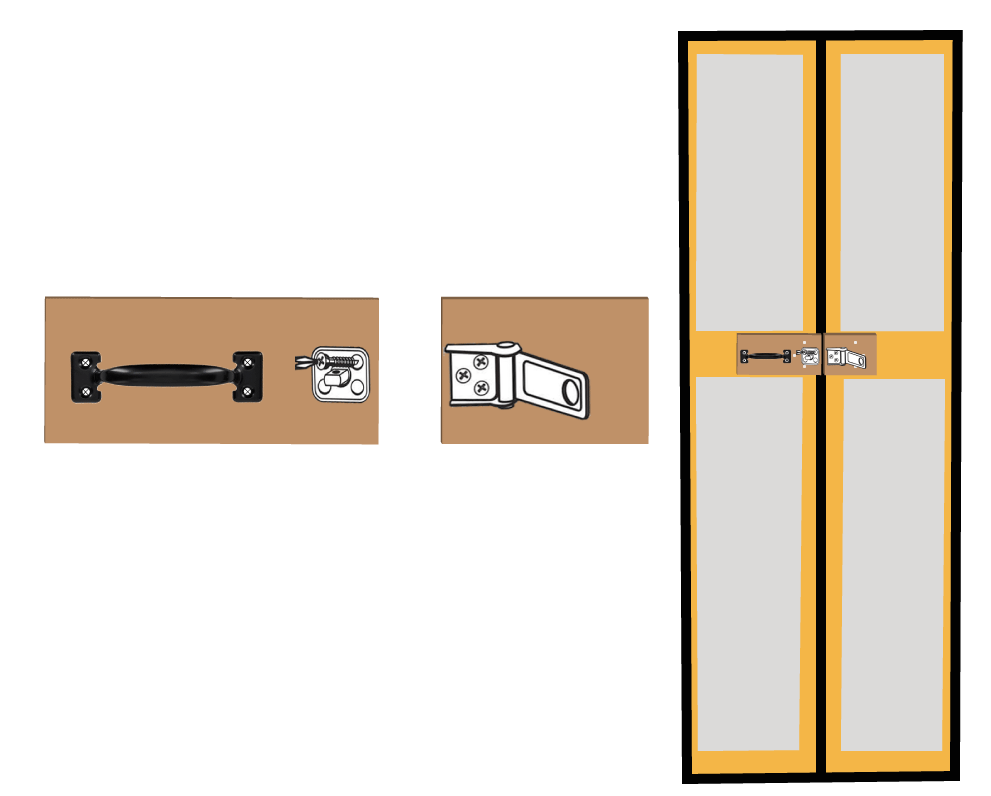
Step 9: Secure a handle to the longer piece of wood
Secure a handle to the longer piece of wood, in whatever orientation you prefer.
Step 10: Secure a swivel hasp lock system to both pieces of wood
Just like in Step 1, hold the lock in place and mark the holes where the screws will go on both pieces of wood. Then screw the two sides of the lock system into place.
Why a swivel hasp lock? We chose a hasp lock with a swiveling staple because it doesn’t require any additional hardware to lock the door from the inside. Just close the hasp, turn the swiveling staple, and done!
Securing the Lift Door (if applicable)
- Close the lift door so that the lift door handle is fully in the “down” position and sitting behind the strike plate.
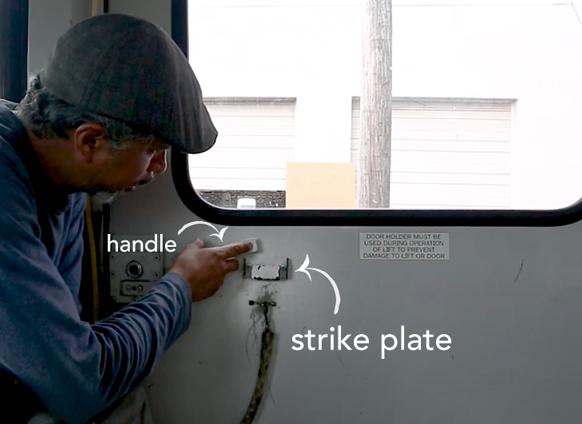
- Drill a hole directly through the lift handle and through the stike plate plate as well.
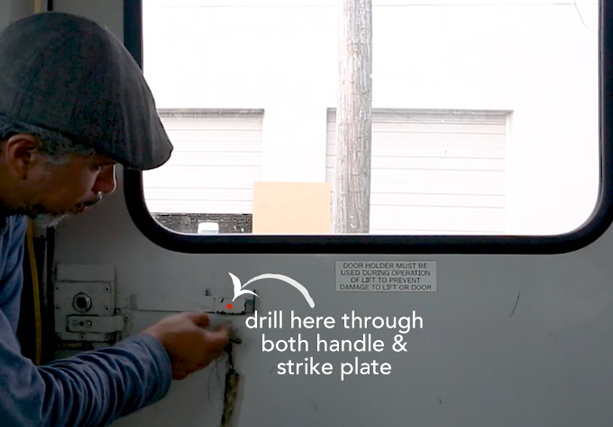
- Loop the chain handle hook through the drilled hole. Now the door is securely locked from the inside.
And that’s that!
We really hope this guide helped you solve your skoolie question of the day. As always, if you have any questions, give us a holler! Happy converting!
<< Back to the Skoolie Conversion Ultimate Guide Homepage

So you’re building a skoolie, huh?
We feel your pain, my friend! We also know how good it feels to finally make a dream reality.
Our skoolie took 9 months and $28,000 to complete. We documented the entire build and are slowly building a series of guides on every step of the bus conversion process.
We spent a crap ton of time figuring out how to do this and that. We also could have saved a few bucks along the way. We hope our tutorials help save you some time and money!
Our TOP 5 Bus Conversion Tools & Materials:
- 5-in-1 Painters Tool (you will use this a MILLION times)
- Impact Driver & Drill Combo Kit (there won’t be a day you won’t use this)
- 100% Silicone (buy in bulk to save a LOT of money!)
- Angle Grinder (get used to using this ALL the time!)
- Table Saw (it will be nearly impossible to complete your conversion without this. It’s WORTH the investment!)
This page contains product affiliate links. We may receive a commission if you make a purchase after clicking on one of these links.