Every skoolie is different. We like to think of the Art We There Yet skoolie as especially unique, as it’s also an art studio and recording studio on wheels! Welcome to our skoolie tour. Let’s dive in!
The bus studio is central to the Art We There Yet project, providing us the capacity to create professional-level work on the road. We spent nine months building the studio. We considered every square inch of space, making almost every feature multi-functional. It contains a recording studio, photography/videography studio, mixed media workstation, living room, bedroom, bathroom, kitchen, dining space, two guest beds, and deck. It is fully off-grid, with solar power and self-contained plumbing. All in 198 square ft of space!
Skoolie Tour | The Living Space
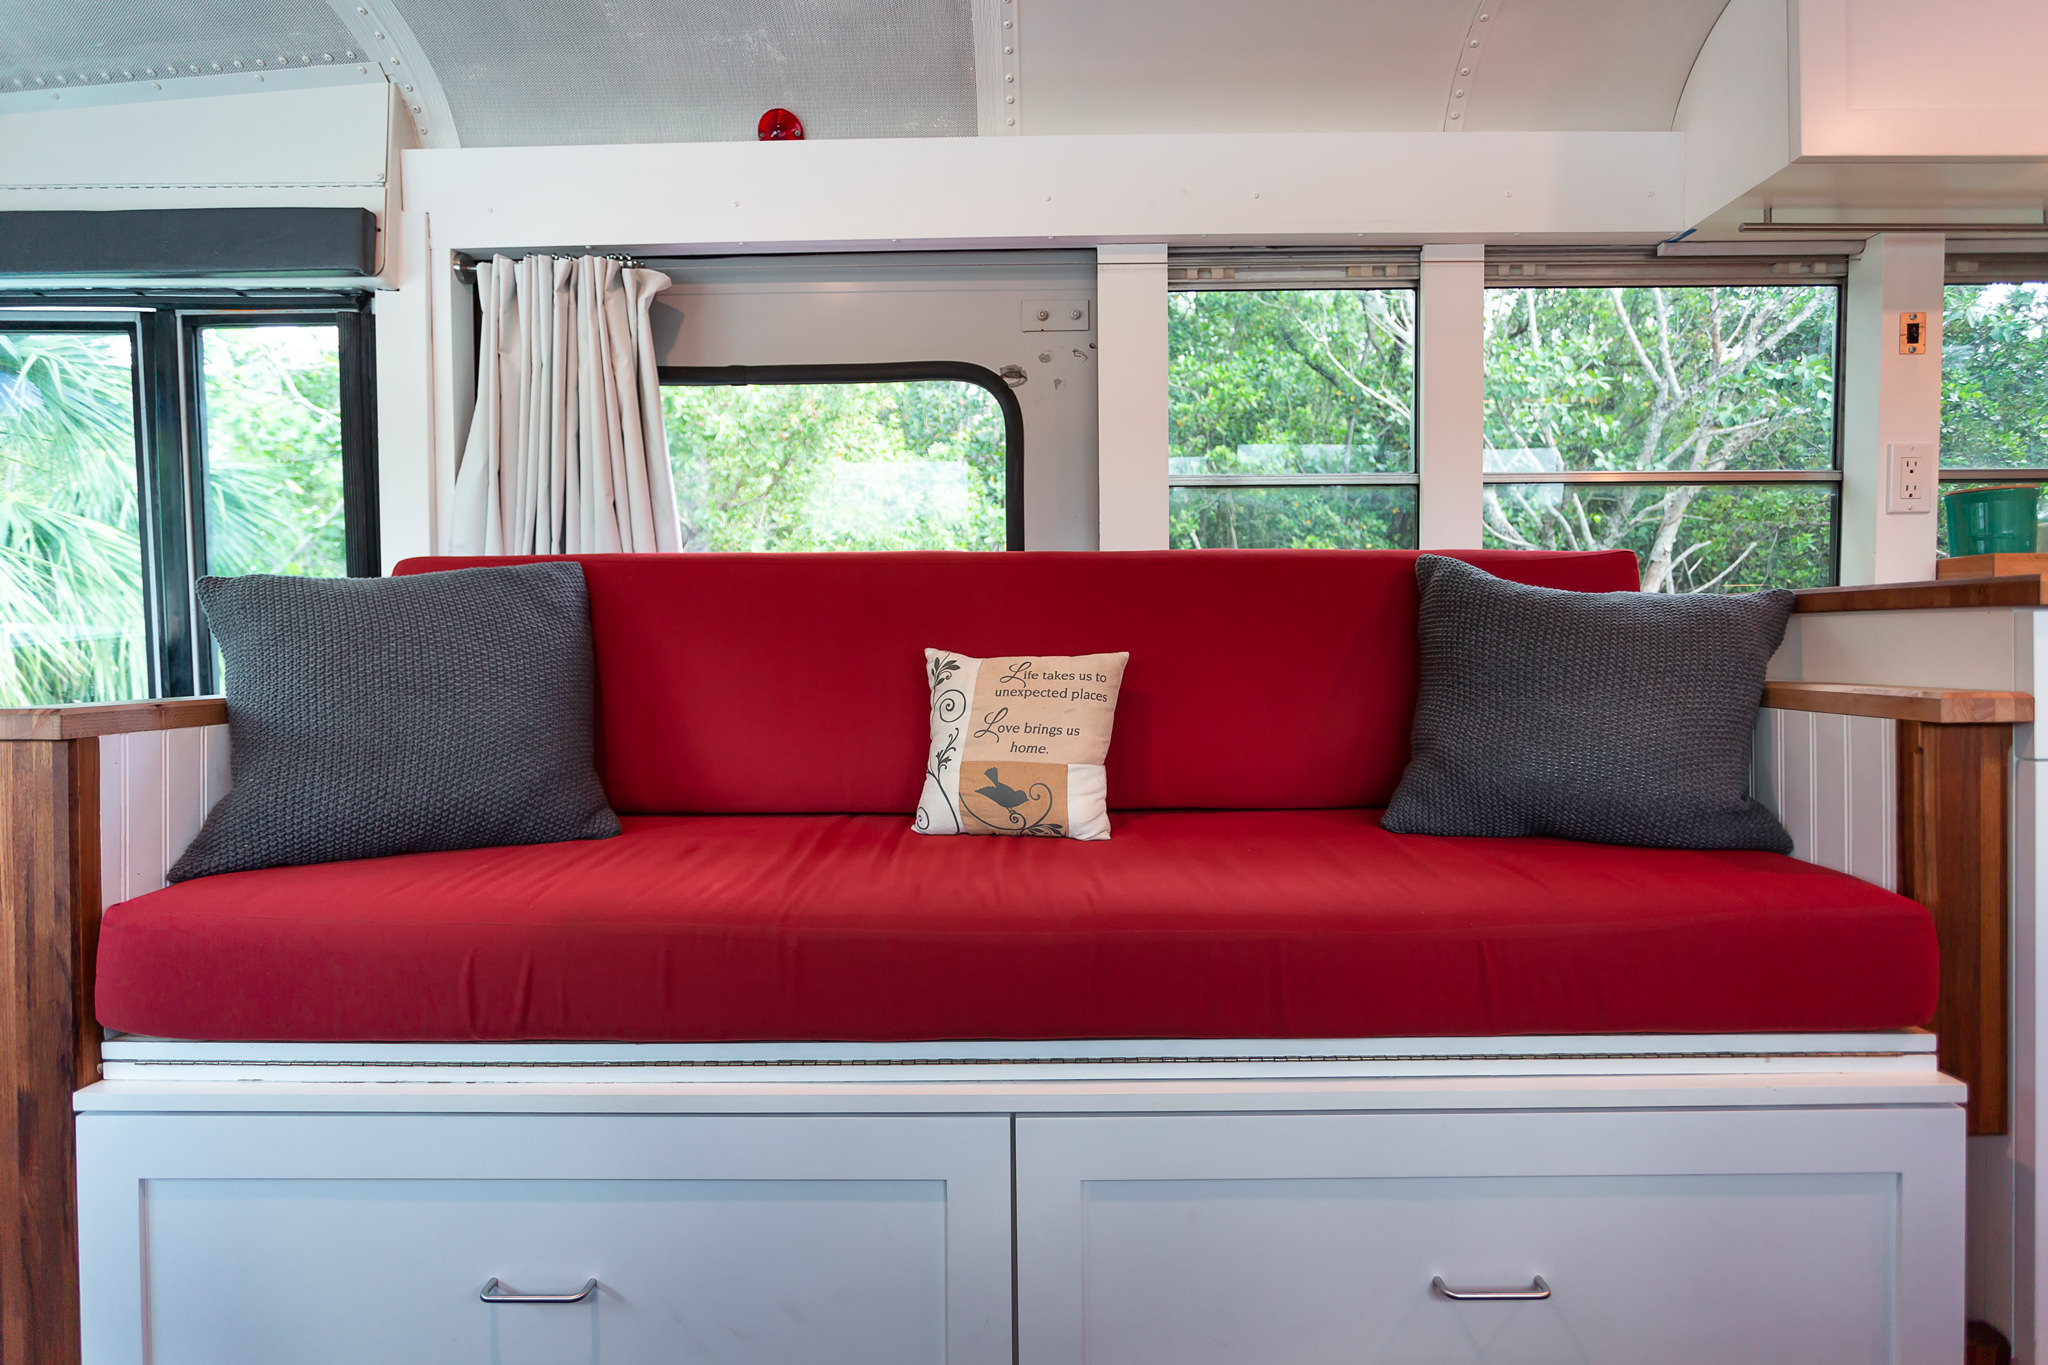
The main living space has a lot going on! This is where we work, cook, socialize, and host visiting artists.
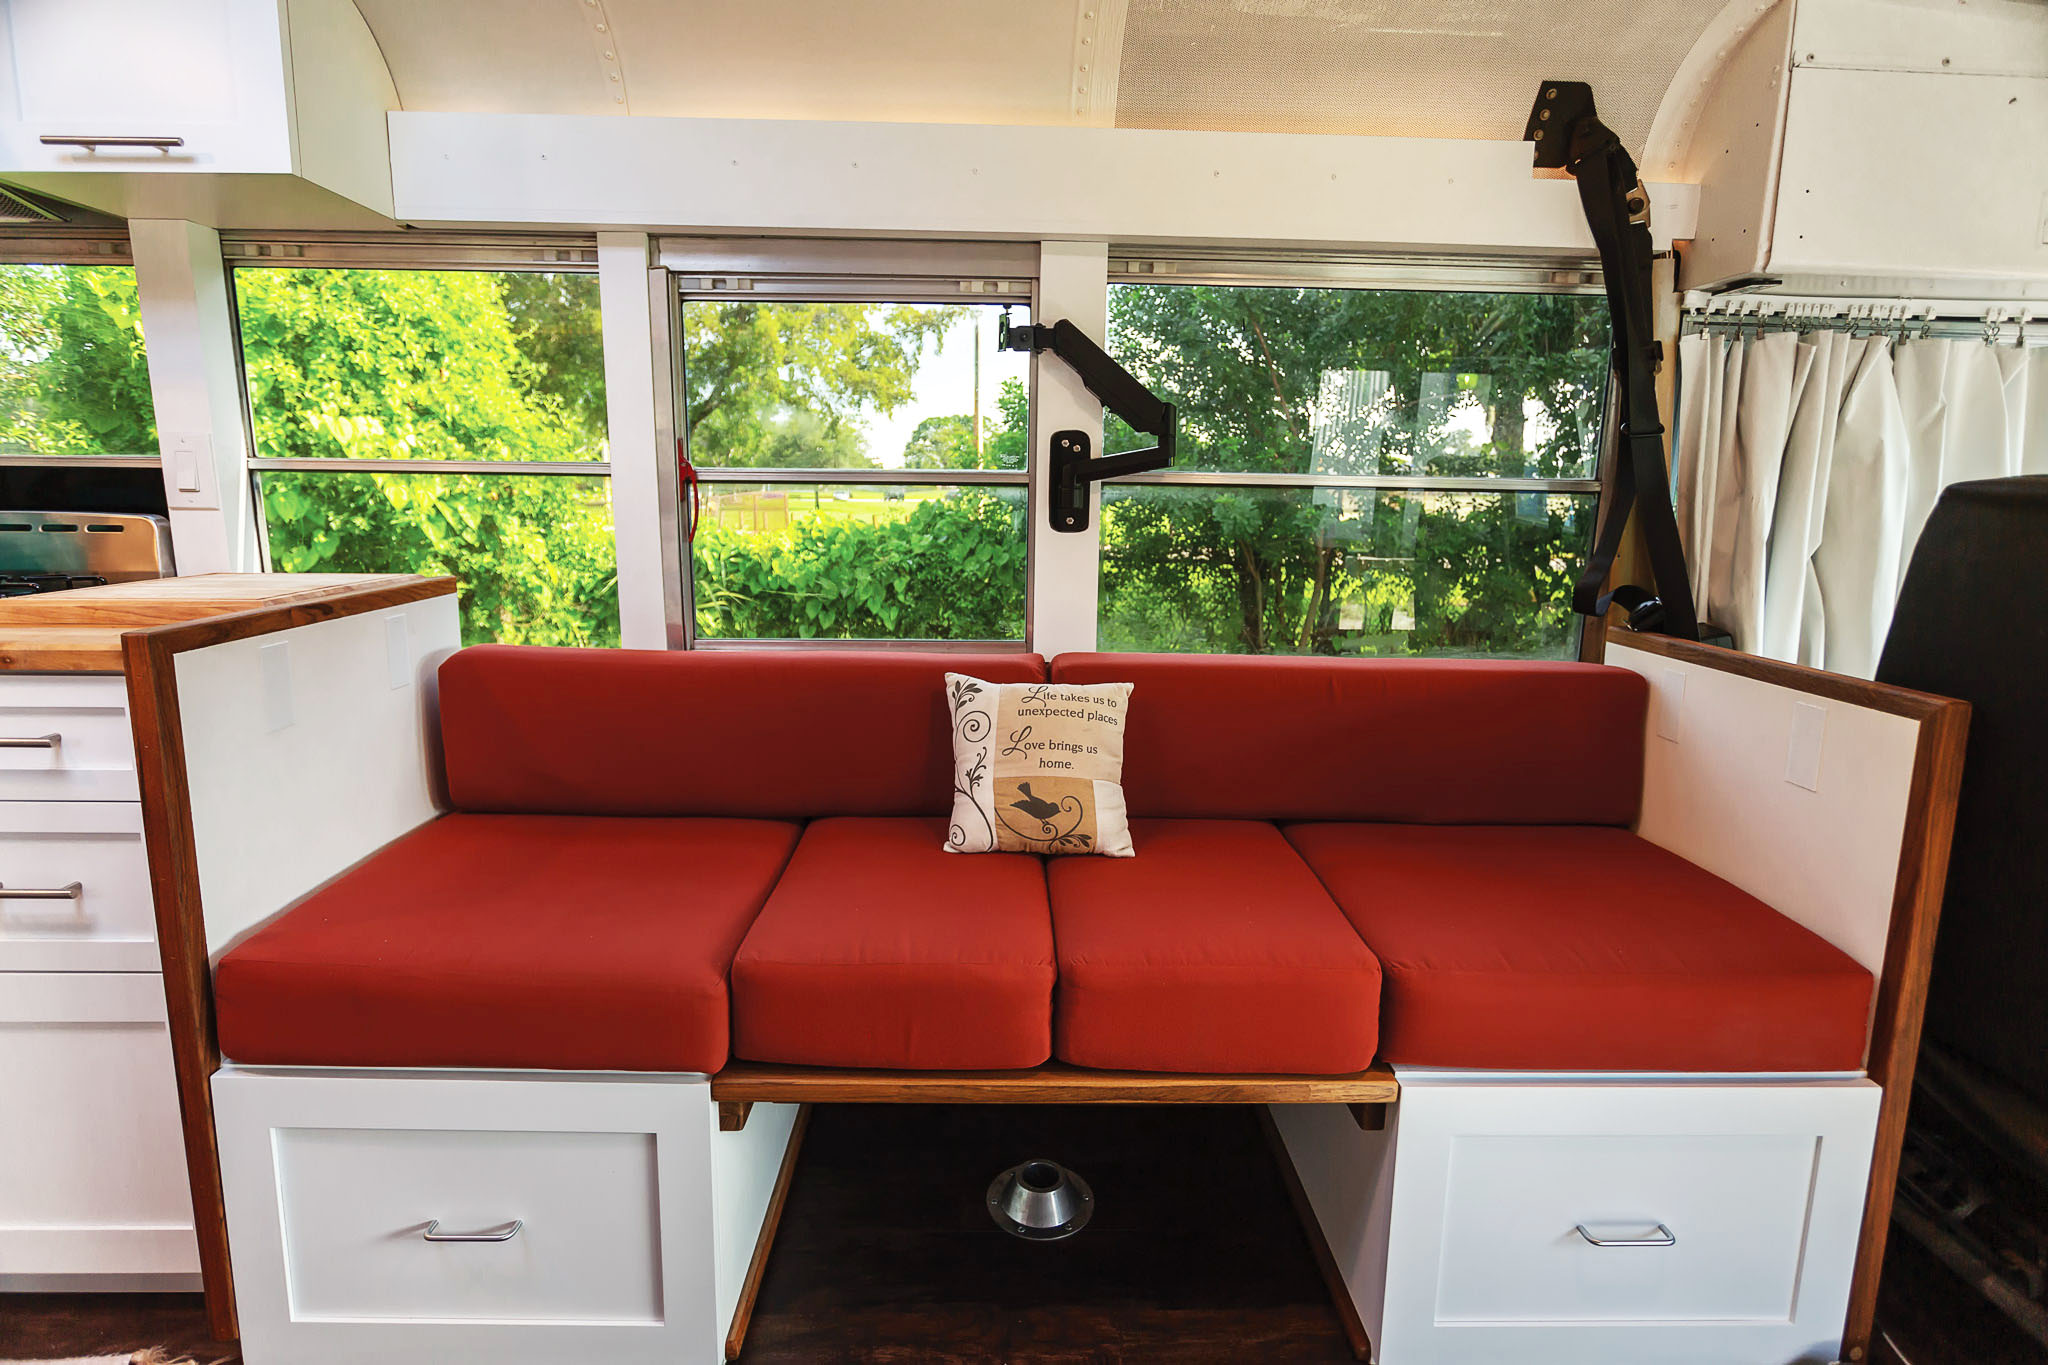
On the left is a sofa, with two large drawers underneath for storage. On the right is a dinette, with storage drawers underneath each seat. The dinette serves as José’s photography editing desk, with a photography editing monitor that swings out.

Skoolie Tour | The Dining Space
The dinette converts into a second couch, which creates a space for socializing and dinner parties. We have a 6ft foldable table stored in the ‘garage’ area in the back of the bus. We set this up between the two couches and can host up to 10 people for dinner. 10 people who are comfortable getting cozy, that is!

Skoolie Tour | Guest Beds
The dinette and sofa both convert into guest beds as well. This was a very important part of the design, so that we could host visiting artists for our artist residency program.
The sofa folds out into a full bed. With the two long cushions removed, the dinette converts into a single bed. The storage space under the sofa is for the visiting artist’s personal items and art materials/gear.


Skoolie Tour | The Kitchen
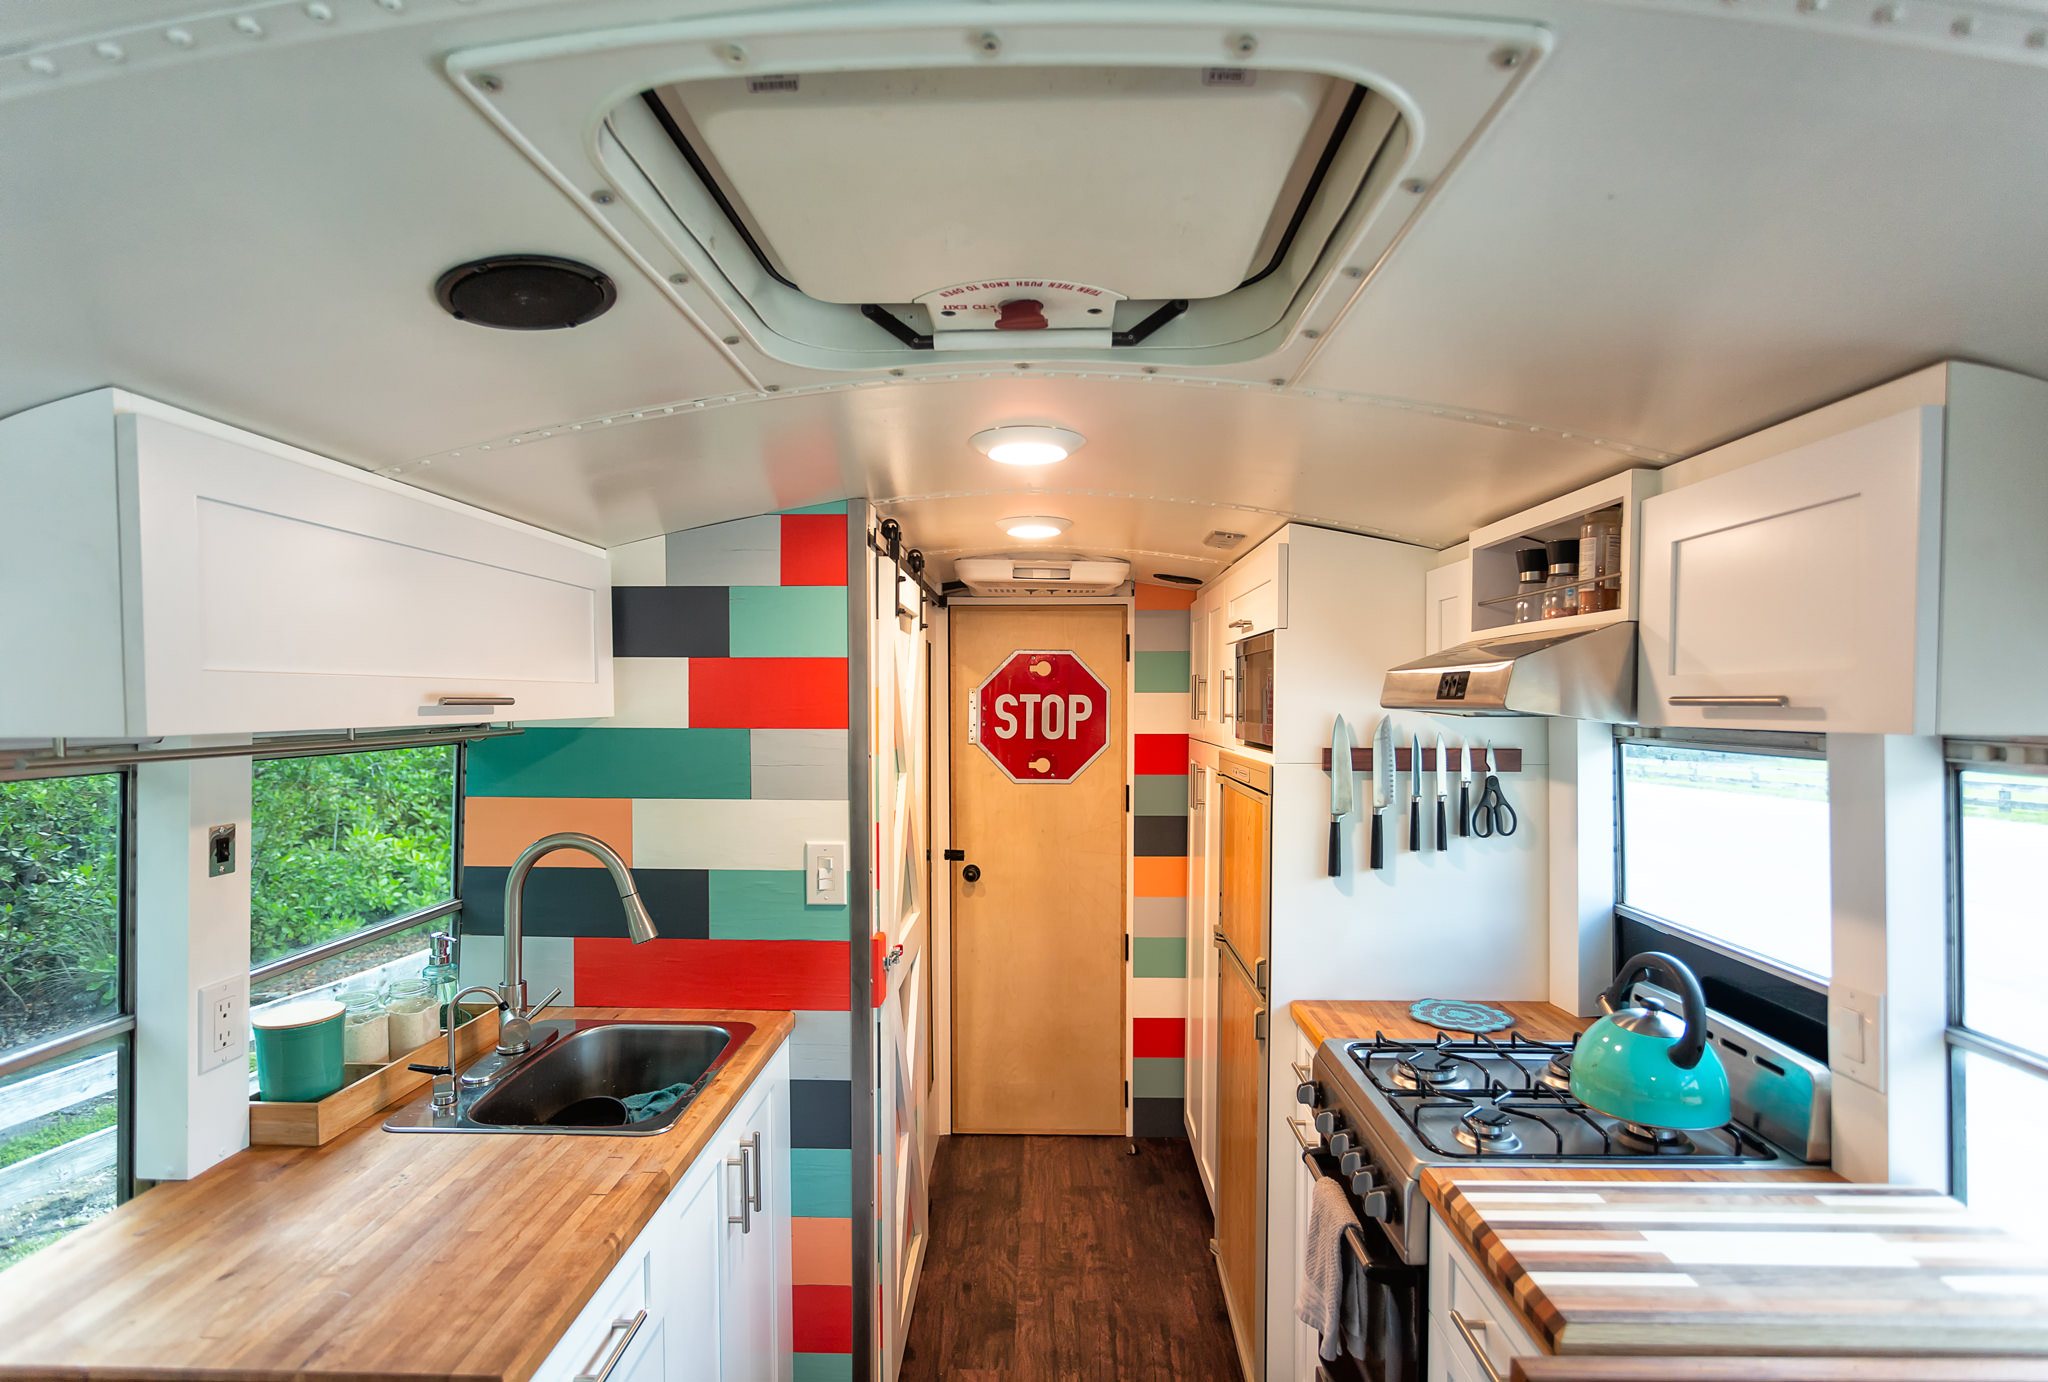
The kitchen is José’s domain and his favorite room in the house. Bus? House? Eh, you decide!
The kitchen has a 20-inch gas-range with four burners and a small oven (just big enough for our 6 quart dutch oven). It has propane/electric absorption fridge, a medium sized sink with hot and cold water, a drinking water filtration system (carbon), and plenty of cupboards and counter space. To the left of the refrigerator is a pantry and more storage space.
Skoolie Tour | The Bathroom
The bathroom is separated off from the living space by a sliding barn door. It has a Nature’s Head composting toilet and a small shower with hot and cold water. The shower pan is 24 x 24 inches.

Skoolie Tour | The Studio
We call this room The Studio because it simply has so many uses, it can’t be narrowed down to one ‘main’ one! Whenever we give in-person skoolie tours, this room is always a big hit.
First, it is a soundproofed recording studio. The keyboard slides our from under the desk. The recording and mixing gear is stored securely underneath the desk and bed when we are driving. Our clothing and personal items are stored in the cabinets on either side of the desk.
To use the space as a photographic portrait studio, we hang a black backdrop along the back wall.
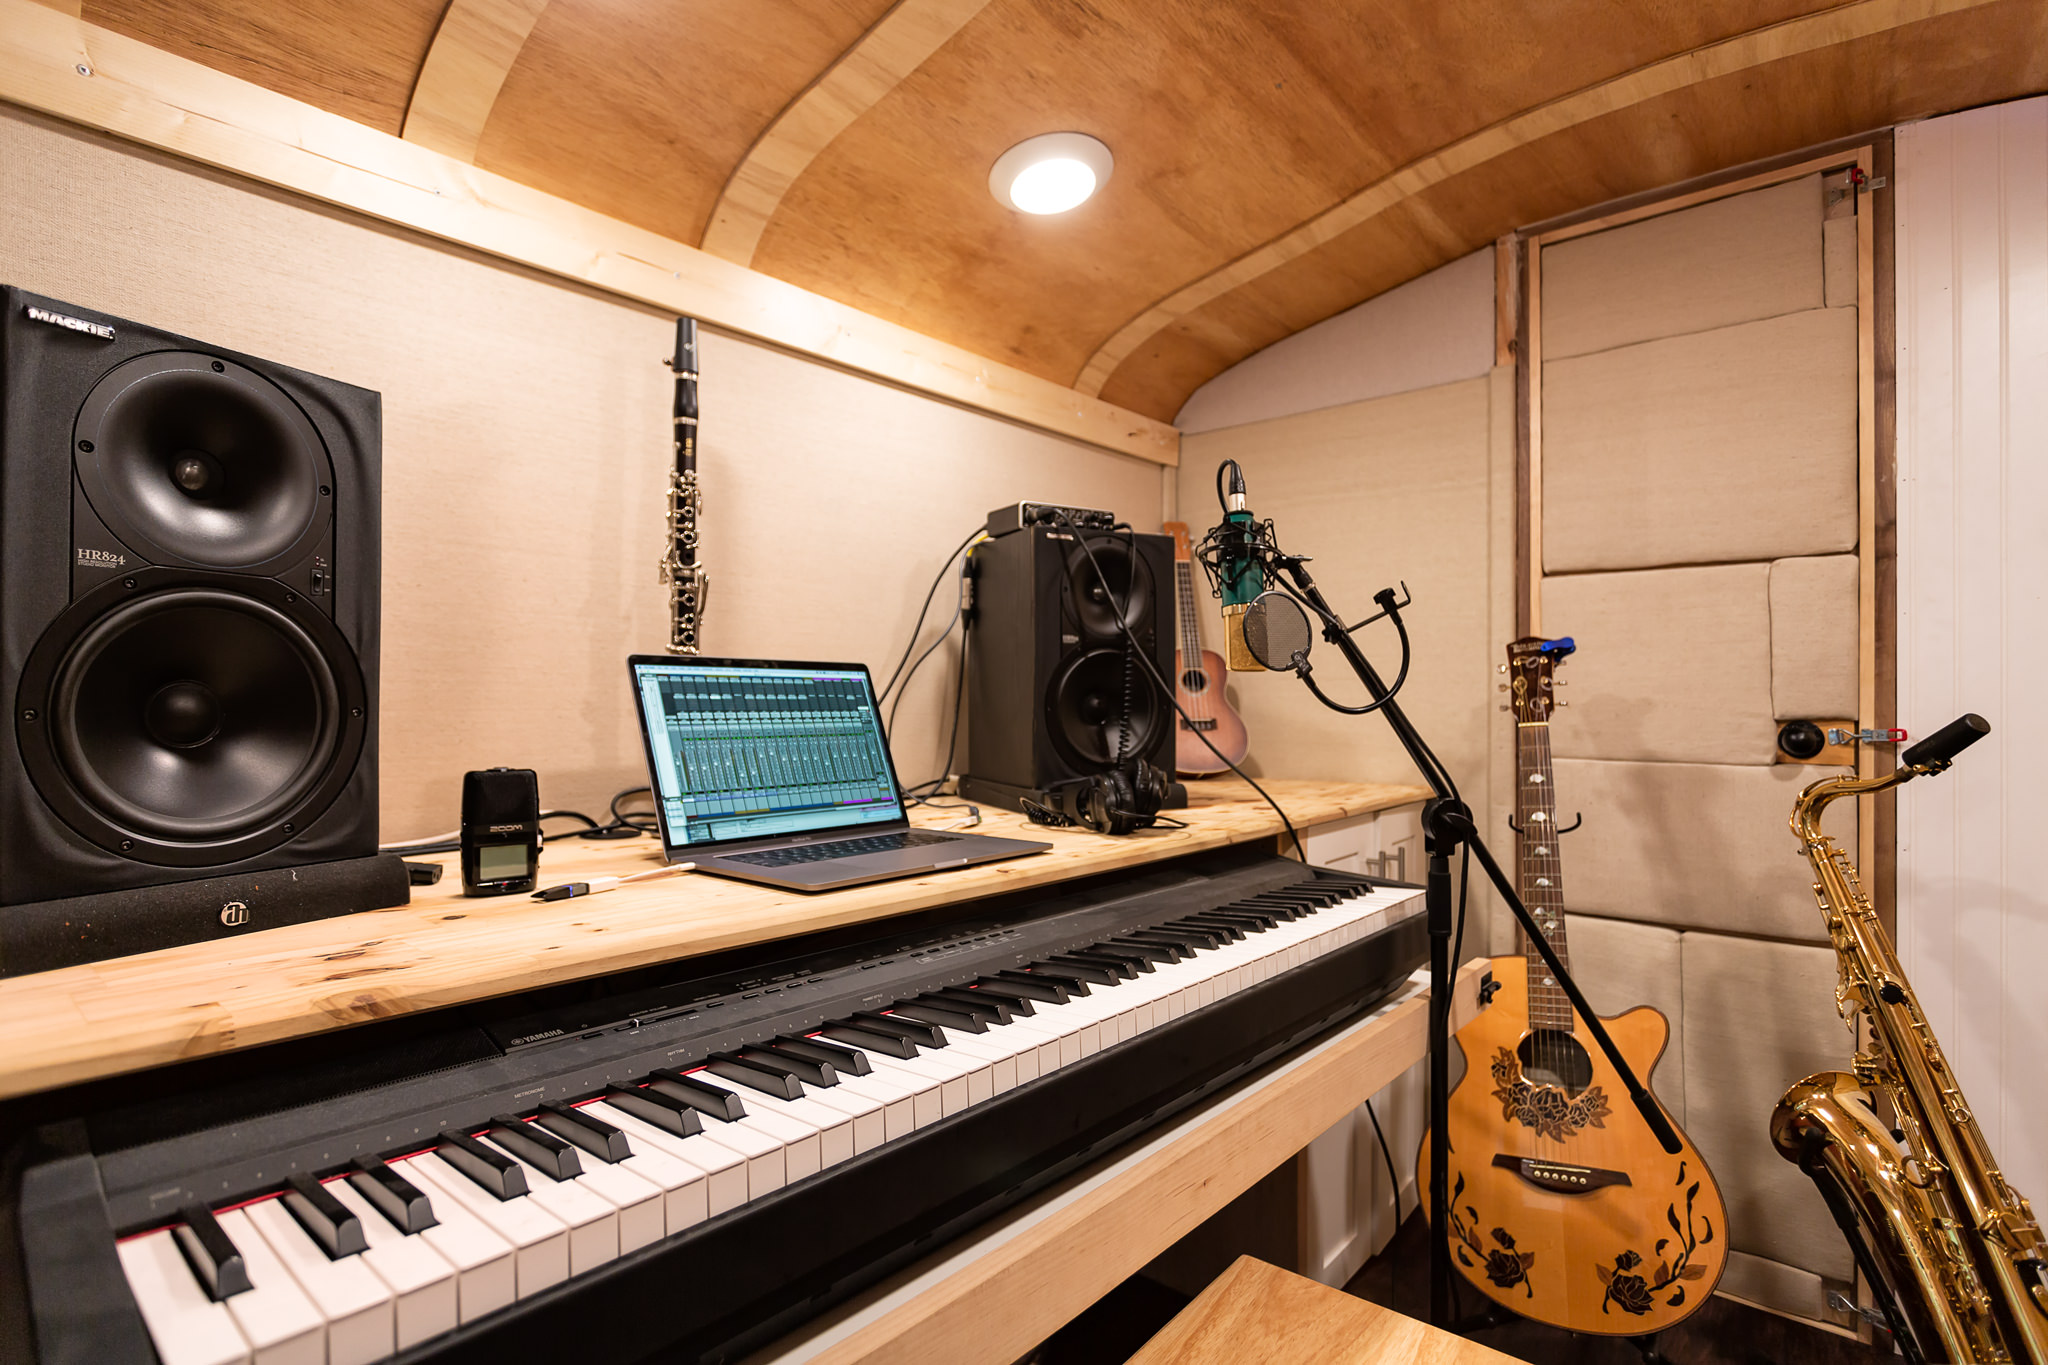
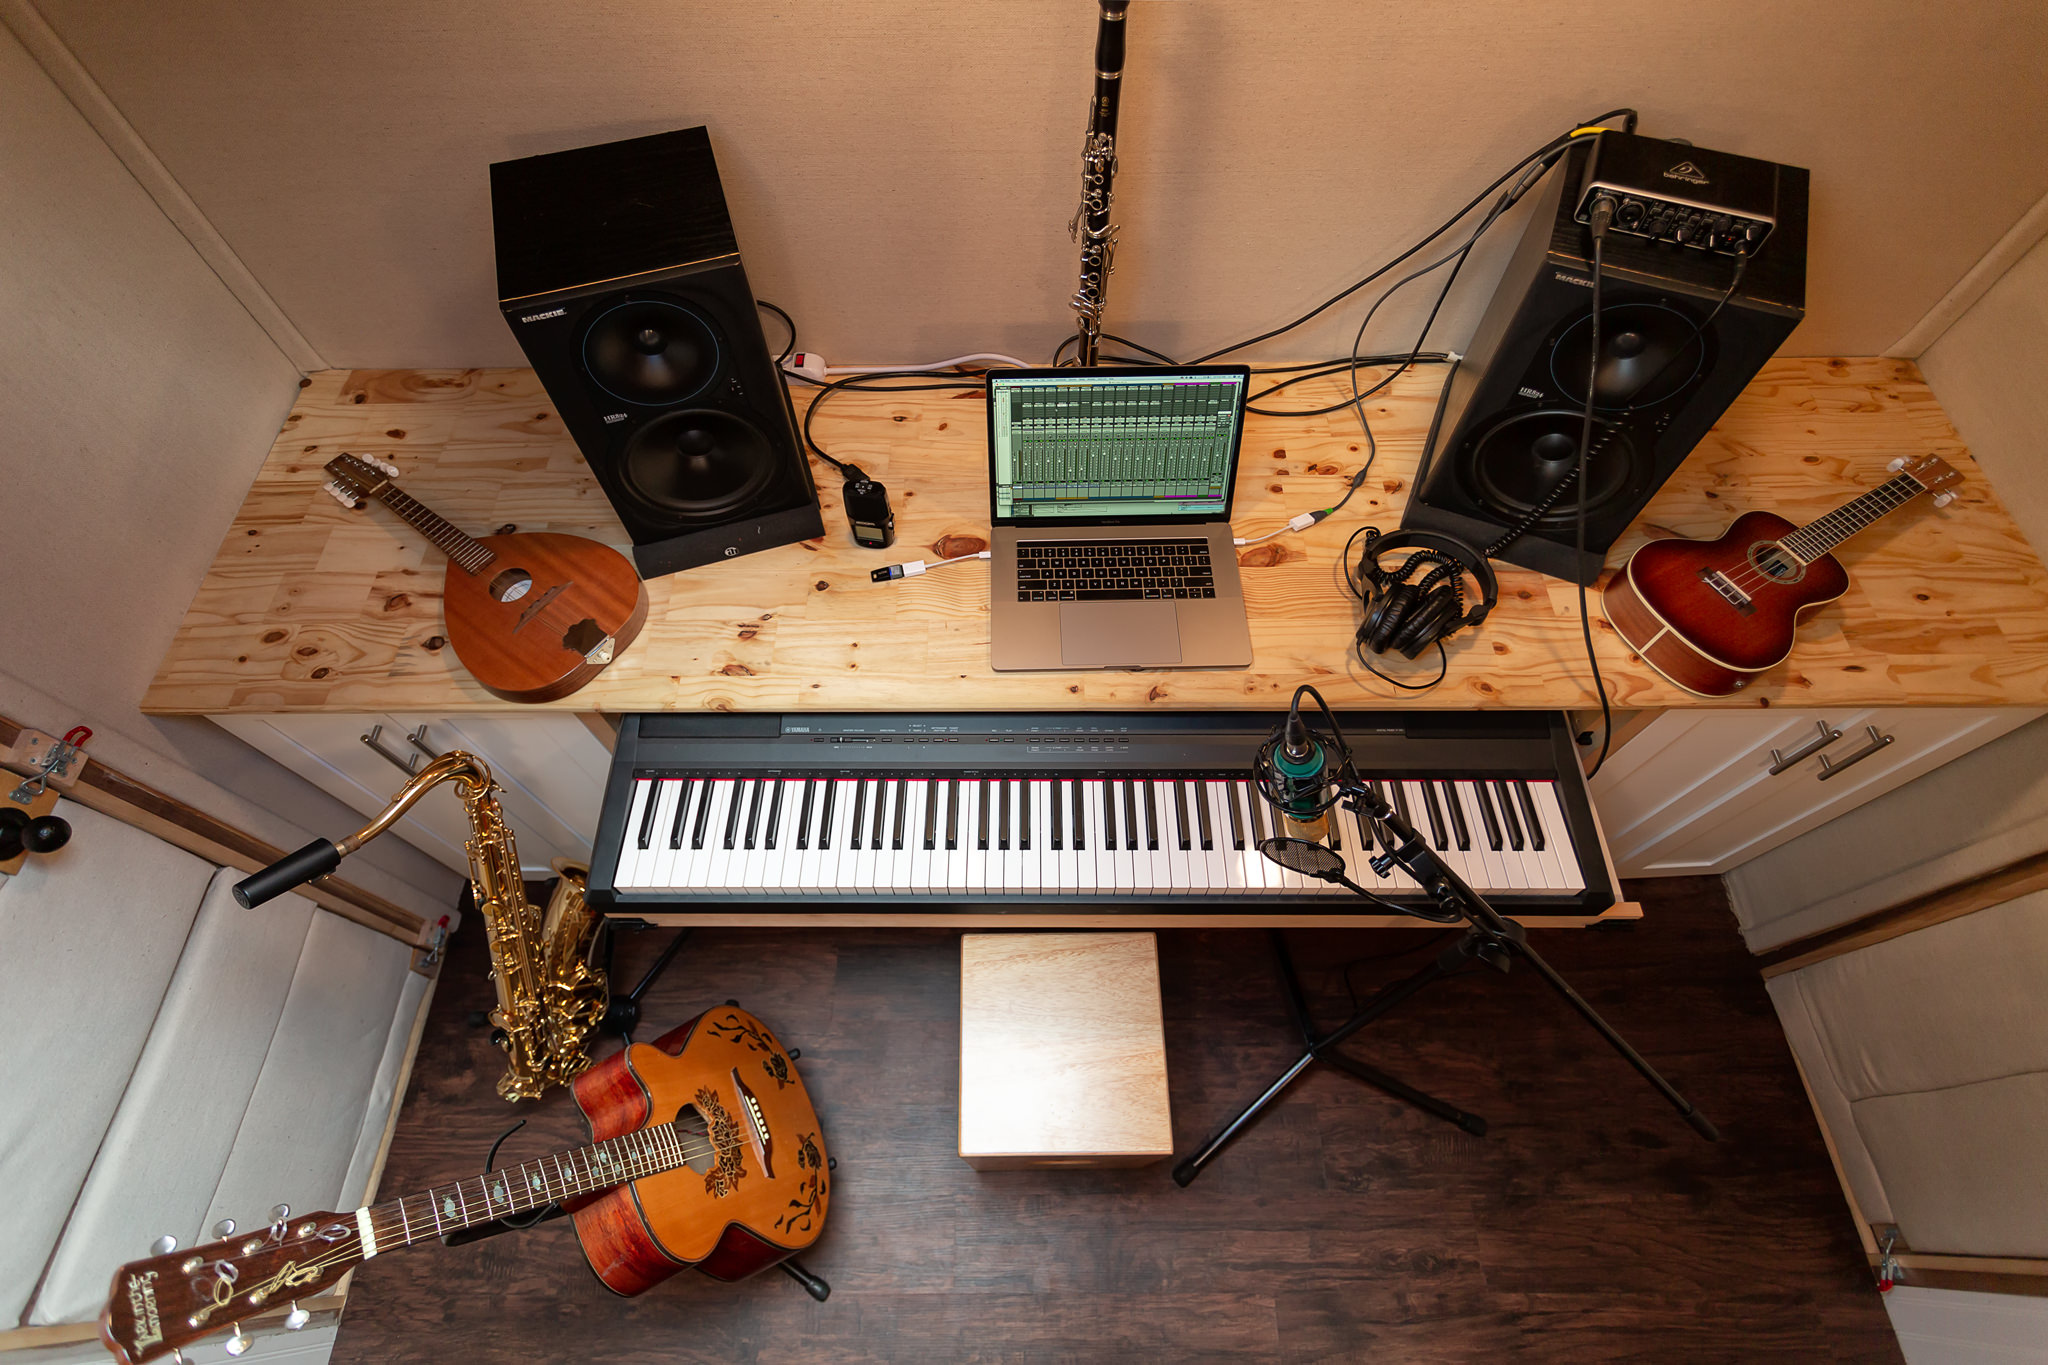
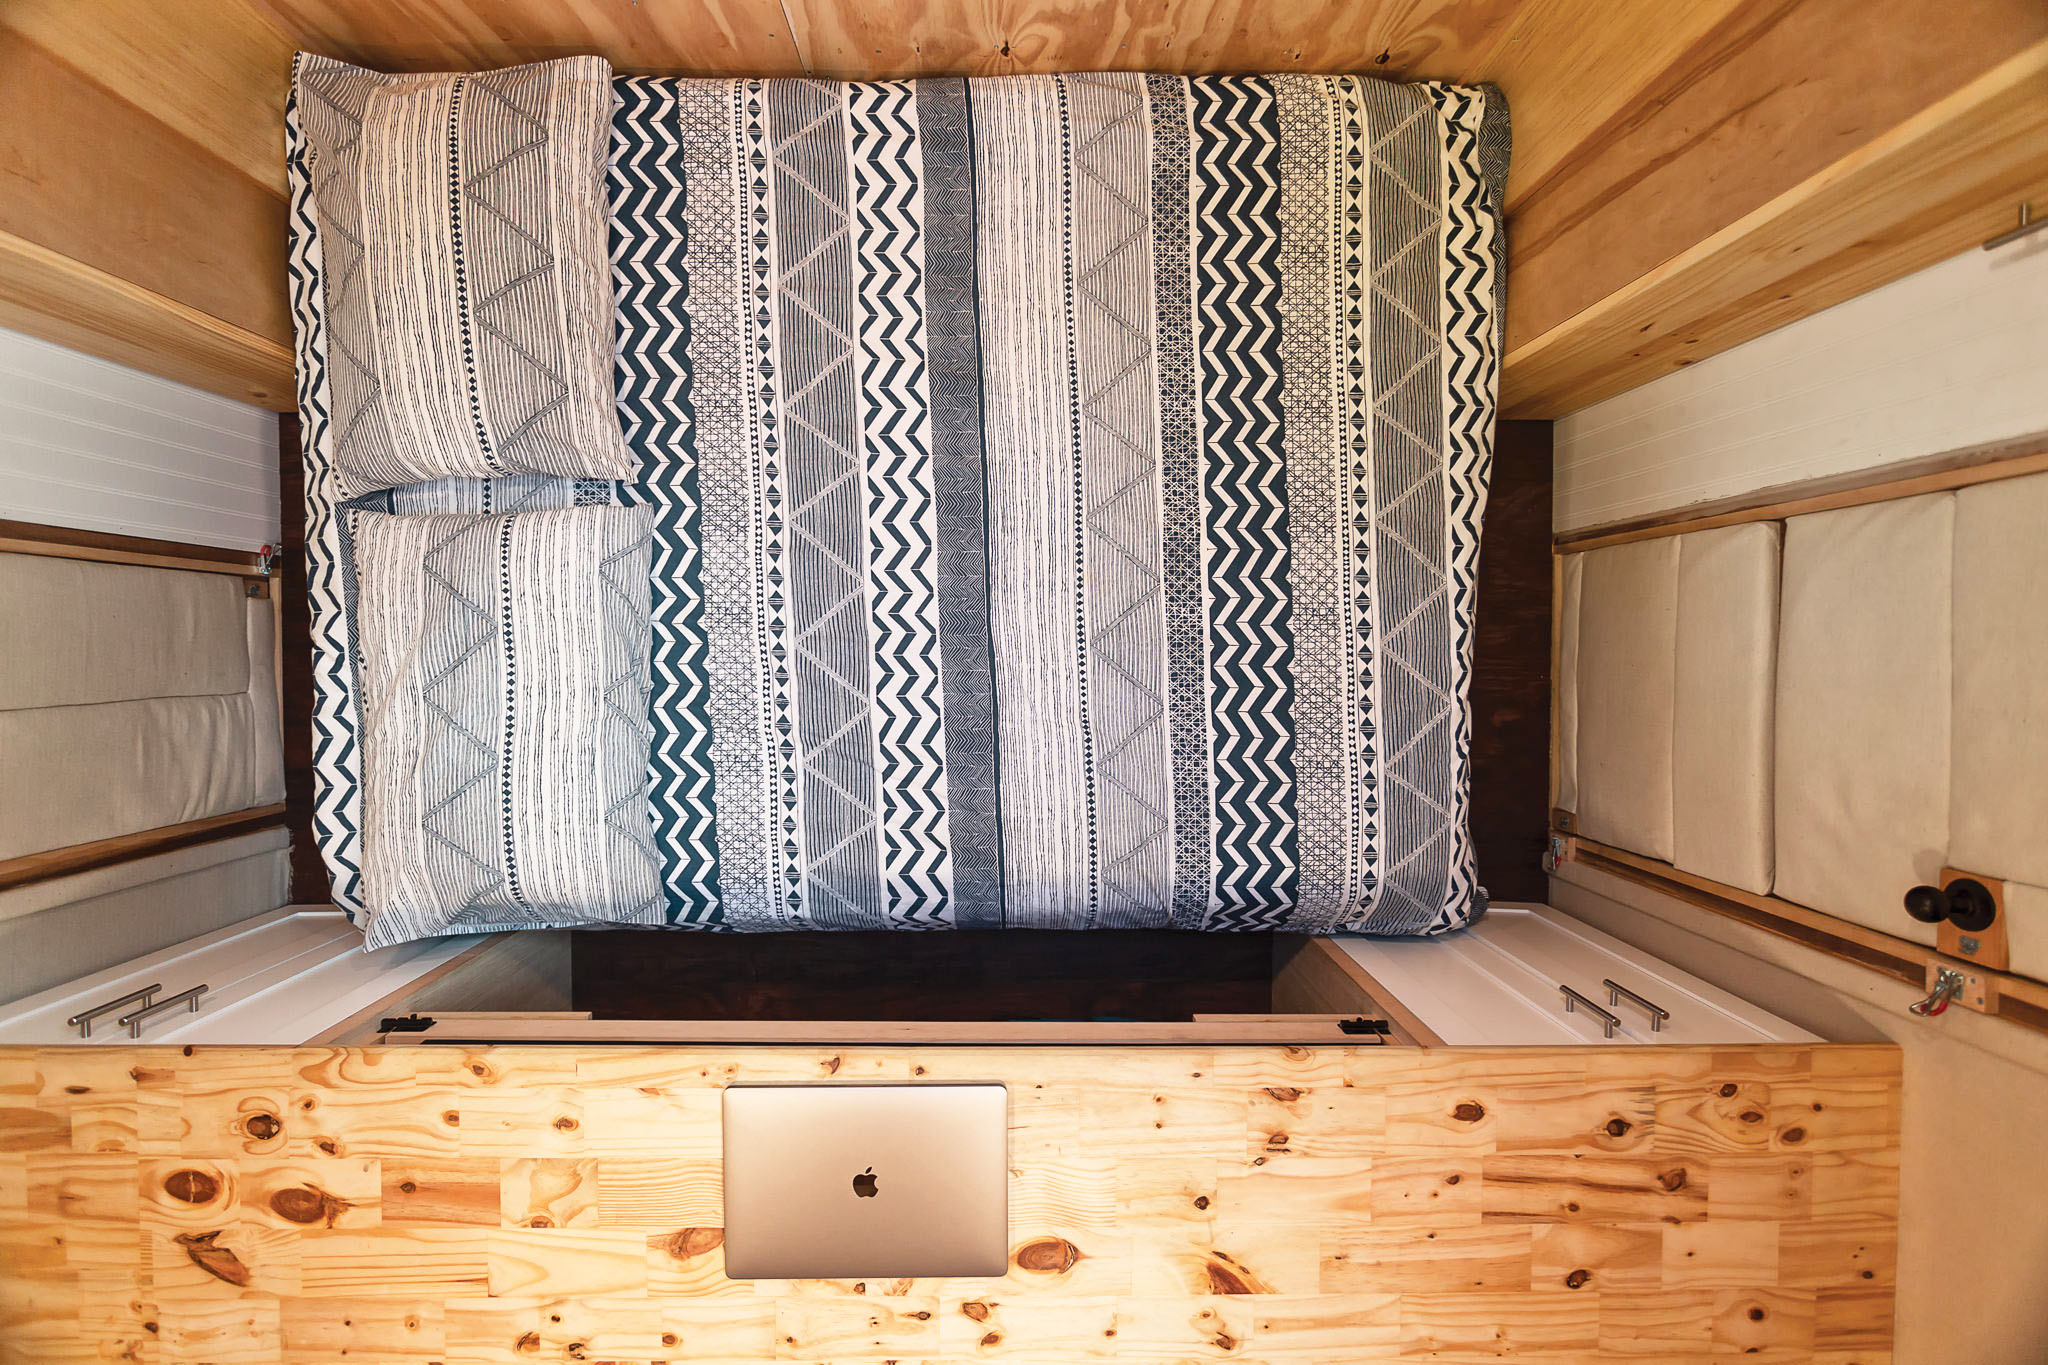
The space is also our bedroom. Our bed folds out from the wall opposite the desk (a murphy bed), and is a full-size bed with a memory foam topper, so it is quite cozy! You can see tall, locker-like cabinets on either side of the bed. This is where we store the instruments and a bit more clothing.
You can also see that the desk, when cleared of recording gear, serves as a large desk. This is for José’s painting and for visiting artists to spread out with whatever artistic medium they are using for their project.
Skoolie Tour | The Garage
Behind the second studio door is a 2ft space that we lovingly call ‘the garage’. It hosts the breaker boxes, solar generator and battery bank, gas generator, dining table, extension cords, and extra paint for murals. You can see the garage in the skoolie tour video , around minute 01:47.
The Nitty Gritty of Skoolie Life
Okay, so now that you’ve seen the space, you probably have lots of questions! We’ve been on the road long enough to know the most common questions. If we don’t answer them here, always feel free to get in touch!
Full disclosure: some links on here are affiliate links meaning we may get a commission if you buy something or take an action after clicking. As an Amazon Associate we earn from qualifying purchases. Not much, but something. This is really important – we only link to products we actually used and highly recommend! That is very important to us.
How much did this skoolie cost? What mileage does the bus get?
The bus conversion (including the cost of the bus) cost $28,793. The studio gets about 6-7 mpg. It has a diesel engine (International DT466E).
How do you heat and cool a skoolie?
For cooling, we have a Dometic 13,500 BTU rooftop A/C. We do NOT recommend this! We wish we would have gone with a mini-split system, as the rooftop unit is really loud. It hampers conversation during social events, which is precisely when it is most useful! The A/C is not wired through the breaker box with the rest of the studio’s electrical (it is never run off the solar generator). The A/C is completely separate, with its own cable that plugs directly into either the gas generator or directly into the grid via extension cord. More on the electrical system here.
For heat, we have a Mr. Heater Buddy Heater propane heater. It is stored in the lower cupboard to the right of the stove, and it is connected via hose to our propane manifold. Here is an in-depth look at about our propane system.
How did we do the custom cushions for our skoolie?
Our cushions were made by Outdoor Fabrics. You send them the exact dimension you need, the type and color of your fabric (they can send you swatches if you like), and you speak one-on-one with a real person (Tracy!) every time. If you want to use this exact design, let us know! Talk to Tracy and tell them her want exactly the same cushions as the Art We There Yet bus, and badaboom, you’re set! We can email you the exact dimensions of the dinette and sofa frames, just get in touch with us!

How is the plumbing set up?
The bus has three tanks mounted underneath. Two 40 gallon freshwater tanks, and a 33 gallon gray water tank. We have a water pump in the lower cupboard to the right of the stove. When either the sink faucet or the shower is turned on, the pump automatically engages and pulls water in from the freshwater tank.
If the sink or shower is set to hot water, the water is directed to the low pressure tankless water heater installed in the cabinet underneath the sink. The tankless water heater ignites automatically when water flows into it. We got the Excel 1.6 GPM tankless heater and we’ve had issues with consistent heating and the igniter (so we’d recommend shopping around for something different).
Both the sink and the shower drain directly to the grey water tank. We use Oasis biodegradable soap for everything – dishwashing, shampoo, body wash, laundry – so anything going into the grey water is non-toxic. We dump it at RV dump stations.
We know this is horribly vague and not extremely helpful. We are working on an in-depth, step-by-step tutorial on exactly how we set up our plumbing. Bear with us while we work on that tutorial!
What about the composting toilet?
The composting toilet is fully self-contained, so we do not need a blackwater tank. The toilet works by separating pee from the poo. The pee goes into a separate container that has to be dumped every 3-4 days (we go to a public toilet and plumb it there). The poo goes into the main container of the toilet where it is mixed with peat moss. After doing your business, you turn a crank that mixes everything together and composts it. A small 12V fan pulls any fumes out through a hose installed through the floor. We give the toilet a break any chance we can (helps with the composting action), and every 3-4 months we double bag the soil and put it in a dumpster. When it is fully composted, it looks and smells just like soil. We still double-bag it just to be safe.
How is the electrical set up?
Here is the nitty gritty on the electrical set up for our skoolie. Every skoolie e has a different set-up, so we really recommend doing what we did and making a comprehensive list of the things you need to power and then working with an electrician for a safe install.
And that’s a wrap!
We know there are probably so many more questions that you have. We had a million and one questions when we were working on our conversion. Check out our School Bus Conversion Tutorials to get in-depth, step-by-step instructions on how we did each stage of the bus conversion. We spent so much time researching, we hope to save you some time and to save you from repeating some of the same mistakes we made along the way! To stay in the loop whenever a new tutorial comes out, join our mailing list!
[mc4wp_form id=”1224″]
<< Back to the Skoolie Conversion Ultimate Guide Homepage

So you’re building a skoolie, huh?
We feel your pain, my friend! We also know how good it feels to finally make a dream reality.
Our skoolie took 9 months and $28,000 to complete. We documented the entire build and are slowly building a series of guides on every step of the bus conversion process.
We spent a crap ton of time figuring out how to do this and that. We also could have saved a few bucks along the way. We hope our tutorials help save you some time and money!
Our TOP 5 Bus Conversion Tools & Materials:
- 5-in-1 Painters Tool (you will use this a MILLION times)
- Impact Driver & Drill Combo Kit (there won’t be a day you won’t use this)
- 100% Silicone (buy in bulk to save a LOT of money!)
- Angle Grinder (get used to using this ALL the time!)
- Table Saw (it will be nearly impossible to complete your conversion without this. It’s WORTH the investment!)
This page contains product affiliate links. We may receive a commission if you make a purchase after clicking on one of these links.